Page 4 of 5 FirstFirst 12345 LastLast
Results 31 to 40 of 41

Thread: Home made fly box revisited

  1. #31
    Join Date
    Mar 2013
    Location
    Central Cali
    Posts
    24

    Default

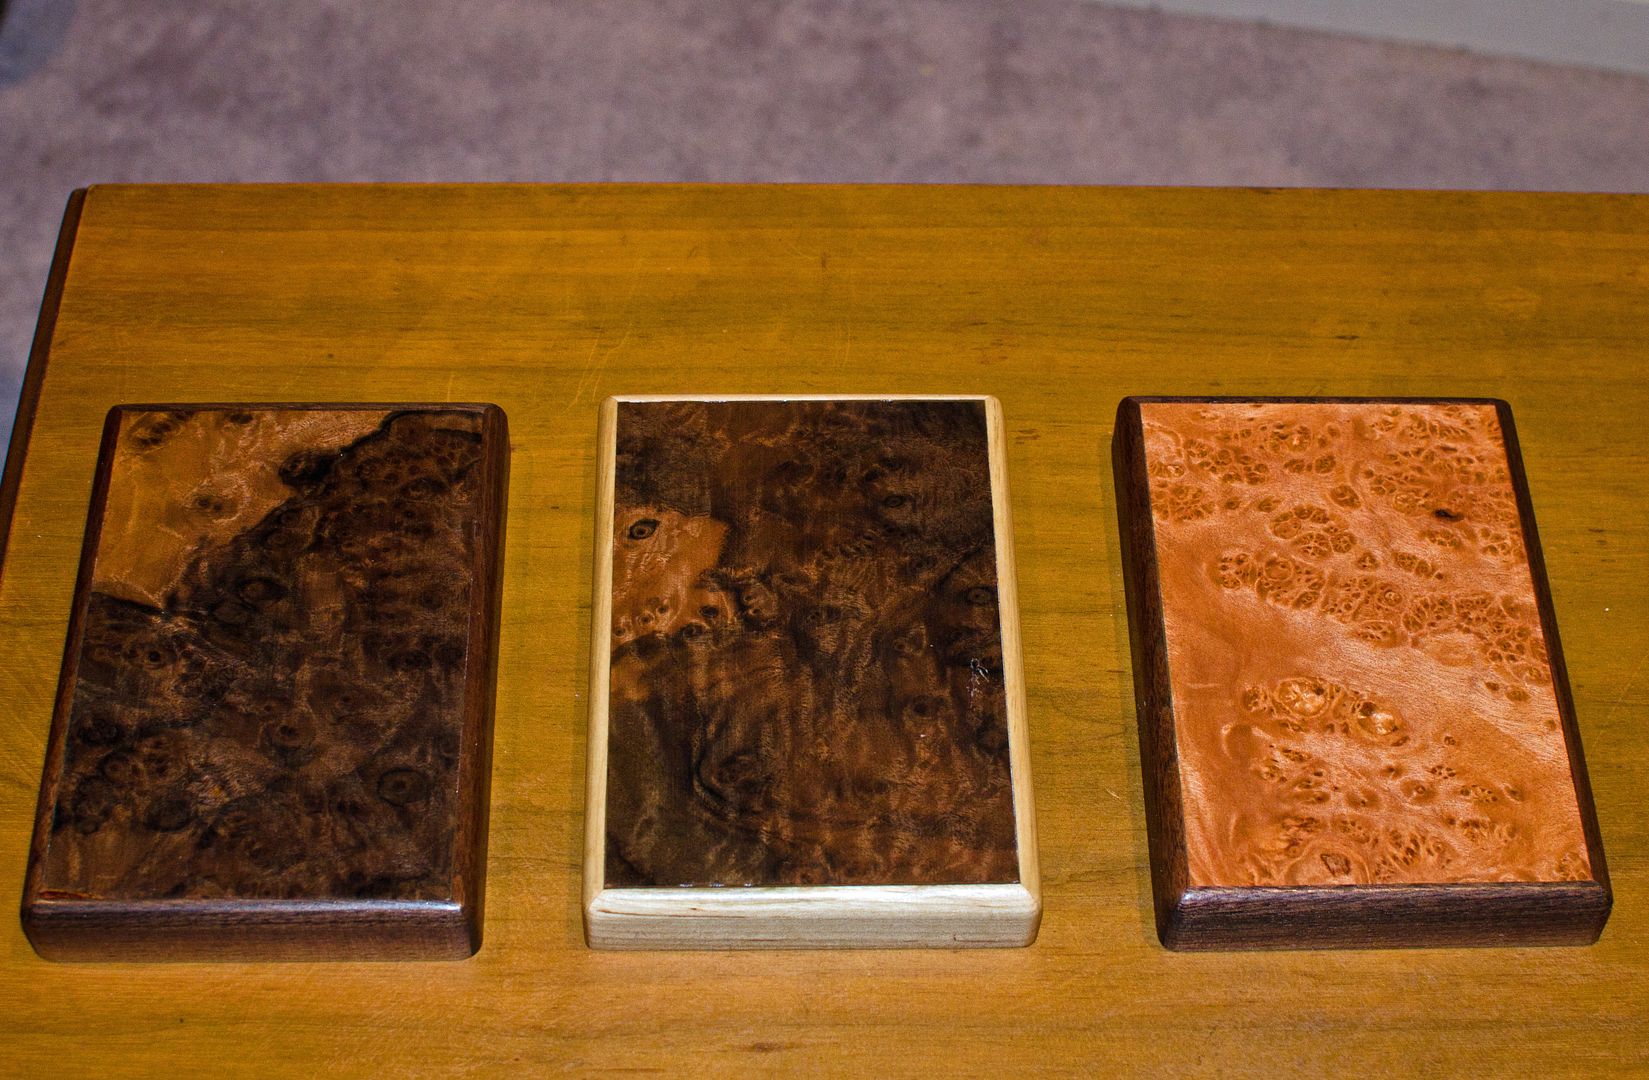
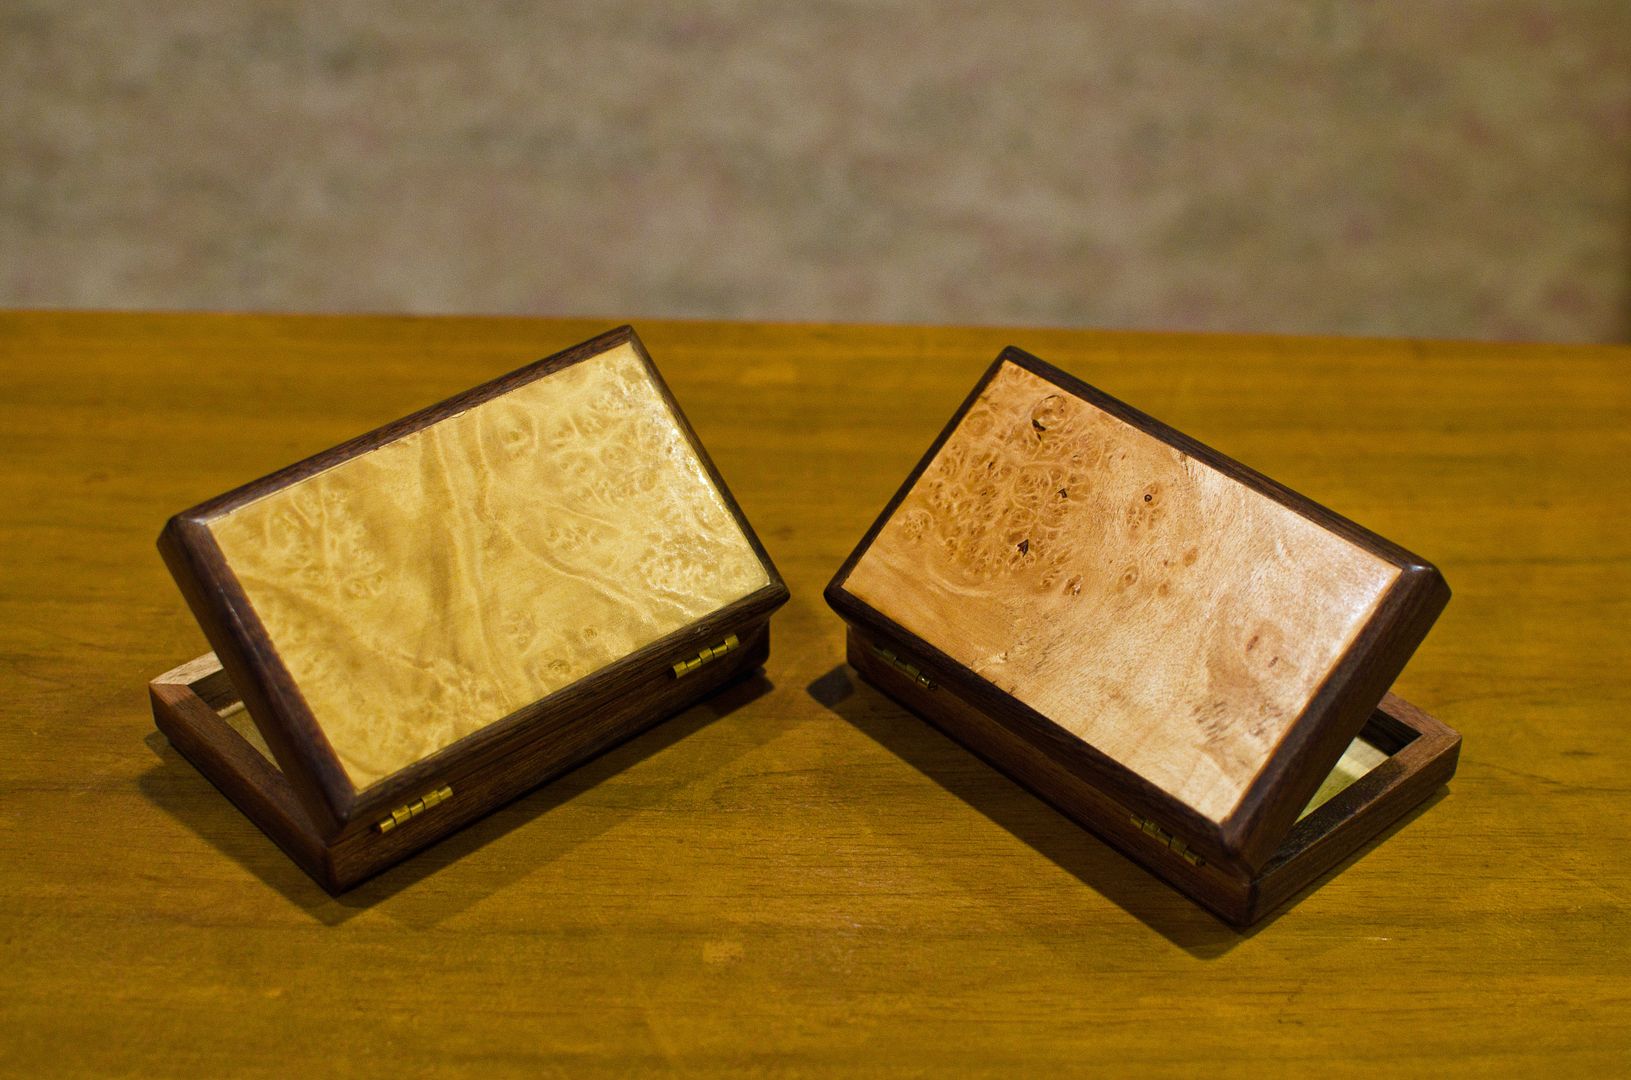
    The engraving was done by a buddy of mine who has a laser engraver. He may be moving out of state next summer so i could be loosing that source. Working on some other ideas as to dress them up a bit. I wondered if the magnets were overkill also. They are 3/16" so there are pretty small, you could probably get by with just one set but its nice and solid. I would be willing to post pictures of the stages on the build up these boxes if anyone is interested. I was able to crank out 6 boxes in one day, less the finish time.

    Nice boxes Jay Bird. The wood you are using is amazing, is it local ?

  2. #32
    Join Date
    Aug 2005
    Location
    PNW
    Posts
    2,934

    Default

    The Myrtle wood is native to the PNW and Mango wood is Hawaiian. Local, no. Domestic, yes. Tho I do believe its classified as "Exotic"

  3. #33
    Join Date
    Jun 2011
    Location
    south lake tahoe
    Posts
    601

    Default

    Love the work guys!
    I look forward to seeing these in the classifieds when i get back from my trip in April.
    They would make great gifts to display on the mantle.

  4. #34
    Join Date
    Jan 2005
    Posts
    336

    Default

    Very nice. Do you sell them? Perhaps you can consign them at the fly shops.

  5. #35
    Join Date
    Oct 2009
    Location
    Porterville
    Posts
    427

    Default

    I'm game Fubar! Post away. Always looking for ways to do nice router work without jeopardizing my clumsy fingers.

  6. #36
    Join Date
    Mar 2013
    Location
    Central Cali
    Posts
    24

    Default

    Cut blanks to size. I made my blanks 3/16" larger than the foam inserts, you can certainly make the box walls thicker if you desire.


    I made a jig that fit a Wheatley fly box inserts (except for the extra meat needed for hinges). There are different sizes and styles. I chose the 6" easy grip. You will have to do a minor bit of foam trimming where the hinges are located. I placed cleats on the backside of the jig that holds that holds the blank over the routing pattern. Place the blank in the jig and trace the router pattern.


    Remove from jig and hog it out with a forstner bit. This saves a lot of time and wear on router bits.


    Place back into the jig to complete the routing.


    1/4" round over all outer edges and if you look closely there in a 1/16" 45 degree chamfer on the hinge side of the box. This is needed to allow the box to open completely.


    I sanded and finished my boxes before drilling a 10mm hole for the hinges and 3/16" hole for magnets.


    Press in hinges, glue in magnets. Im sure i forgot something but i cant think of any thing else. Its really a pretty fast project.

  7. #37
    Join Date
    Nov 2012
    Location
    Neither new or improved, but now in Redmond OR
    Posts
    569

    Default

    Beauty and thanks for psting that and taking the pictures to go along with it. I can use that same process for making folding travel cribbage boards with room for a deck of cards and pegs inside. Would you route out an area for a veneer insert if you went that way - or would you glue on a full size veneer and then glue on a border?

  8. #38
    Join Date
    Mar 2013
    Location
    Central Cali
    Posts
    24

    Default

    Great idea! It would make an awesome folding cribbage board.

    Quote Originally Posted by DLJeff View Post
    Would you route out an area for a veneer insert if you went that way - or would you glue on a full size veneer and then glue on a border?
    Im not exactly sure what your asking? sorry I'm kinda slow.

  9. #39
    Join Date
    Aug 2005
    Location
    PNW
    Posts
    2,934

    Default

    Thank you for the step by step. I like the way you bore it out on the drill press. I just stepped the depth up on the router in incriments. I guess neither way is easier. I oughta do one out of cedar or redwood one of these days just to experience the joy of soft wood. LOL I was thinking about doing some your way, but making multiple jigs along one long piece of ply. Clamp it to a 6'-8' length of stock and just move down the line and bore out 10 or 12 cavities in one session. Then just cut the boxes out on the chop saw. Whare are you getting your hinges if you dont mind me asking?

    I have been playing around lately and working out some bugs in my own fly box design. Heres a few.

    these are 4X6's waiting for a final polish and hardware.


    Heres two completed 3X5's


  10. #40
    Join Date
    Oct 2009
    Location
    Porterville
    Posts
    427

    Default

    Thanks Fubar! Like removing most of the material with the Forestner. That would make the routing less tedious and faster.

    Jay talking about soft wood, I made some bit boxes for my brad points from poplar. A big mistake! I had incredible issues with stability. The boxes would shrink and swell with the changes in weather. Got so bad that the lid wouldn't close in damp weather. I always thought poplar was really stable.

Bookmarks

Posting Permissions

  • You may not post new threads
  • You may not post replies
  • You may not post attachments
  • You may not edit your posts
  •