Results 1 to 9 of 9

Thread: Step by Step, Radical Caddis

  1. #1
    Join Date
    Jan 2005
    Location
    Sacramento, CA
    Posts
    1,022

    Default Step by Step, Radical Caddis

    Haven't fished this much but there was some interest in this fly awhile ago, someone wanted a step by step.

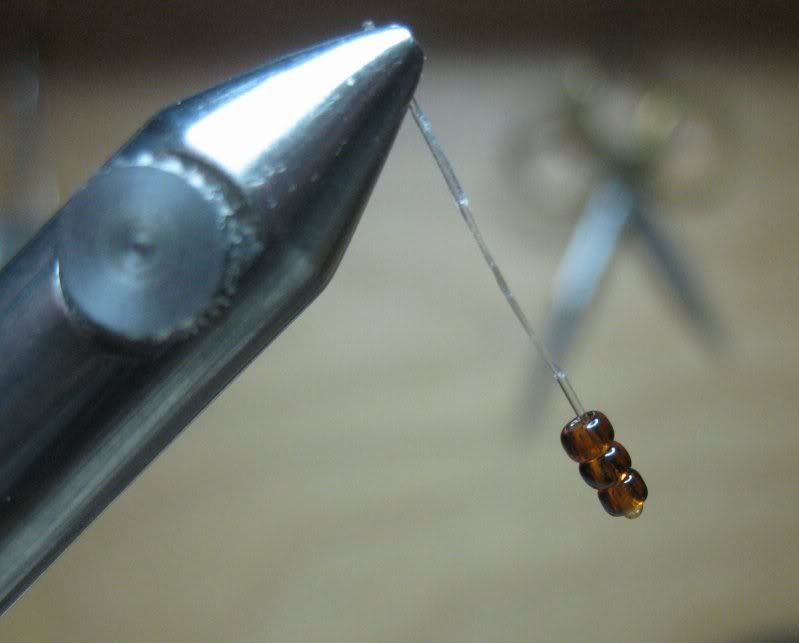
    Thread some beads on some Mono. I like Mason's hard nylon for this. 12lb test or so. I usually put a lighter color or shinier bead in the middle. I burn the end of the mono so the beads don't slip off.


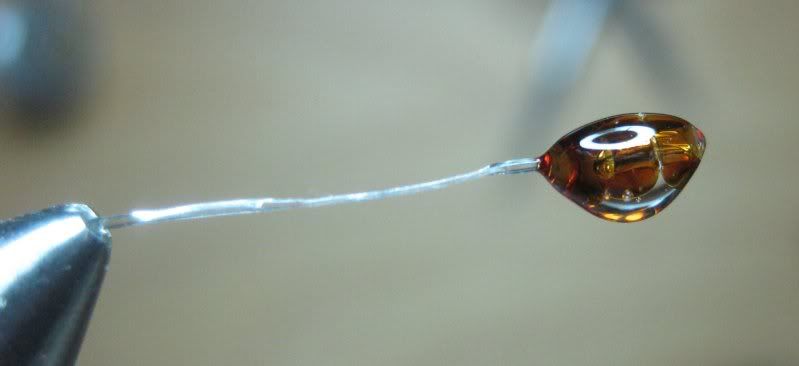
    Add some knotsense or your favorite goop to cover the beads


    I rotate the vice to even it out and then cure it. I don't worry about a top coat now, the tacky stuff will come off as the fly is tied as it's being touched and stuff.


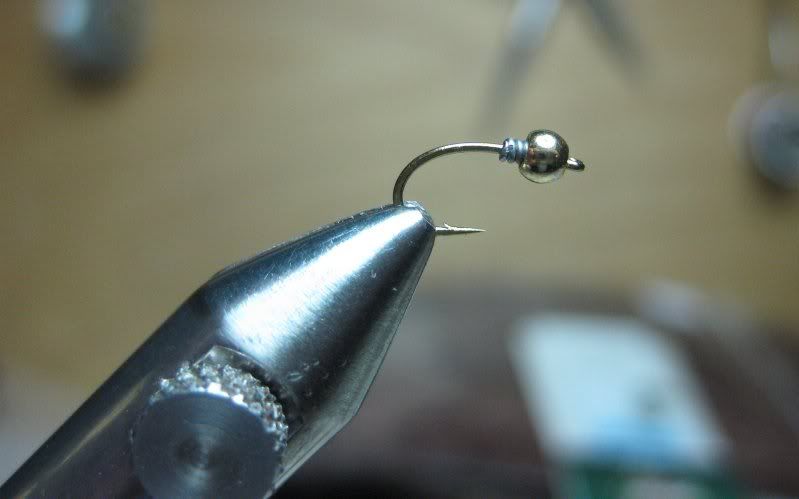
    Put a bead on your hook, I'm using a TMC2487 or something like that here in 14 or so, put some lead wraps on or you can leave them off.


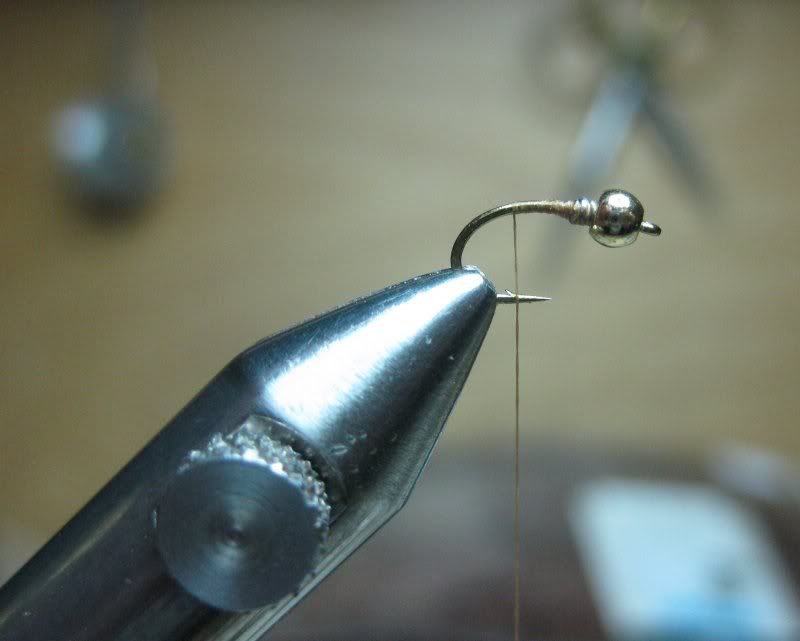
    Start my thread, using tan Gordon Griffith's 14/0 here.


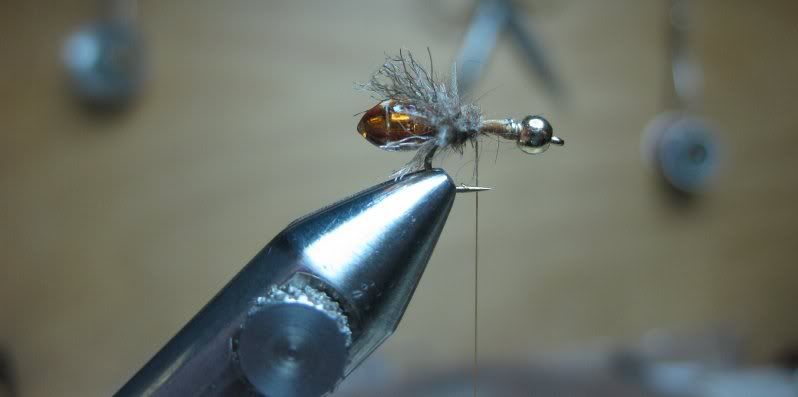
    Before tying in the abdomen, I put a little underbody of ginger Z-lon down and flair it out, then tie in the body. If you didn't use lead, measure out the length of the mono to go the length of the shank right up to the eye. This will secure the bead as well, just push the mono into the bead until it's snug and tie in.


    Tie in a brown z-lon over wing and I put in some greyish brown cdc dub. I use a split thread technique for the dubbing.


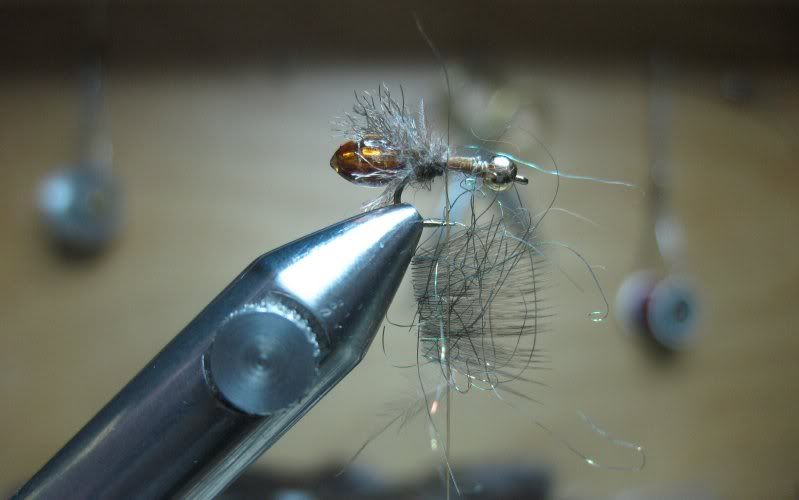
    Next, I use a magic tool with partridge and peacock ice dub (small amount). I forgot to add in two strands of crystal flash, but you can do that here as well. I split the thread and inserted the patridge hackle and dubbing.


    Spin it up tight. I use a nor-vise automatic bobbin, it's spins very well as it's compact, centered and has a fair amount of weight.


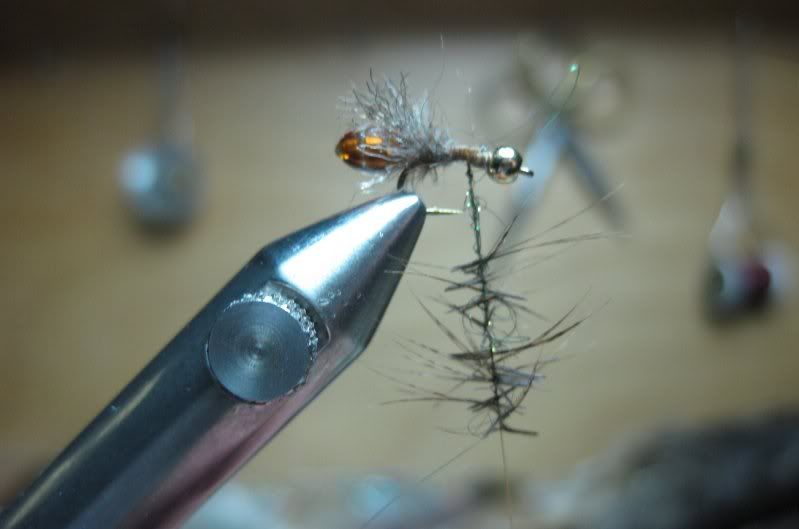
    Wrap on your hackle and dubbing, sweeping back the partridge as you go.


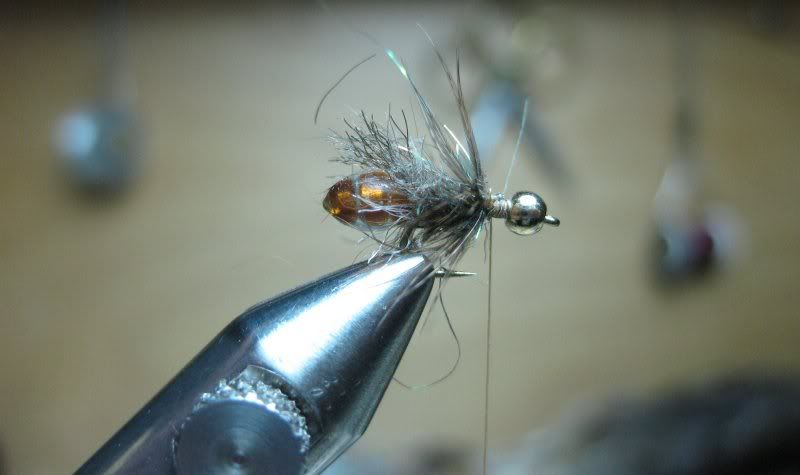
    Next, I tie in brown ostrich herl, wrap it forward, tie off, whip finish behind the bead and done.


    Come back and top coat the body with hard as nails or your topcoat of choice. If you want though, before tying the fly, you can wipe it clean with alcohol and add the topcoat before tying the rest of the fly, but I found that it was pretty much ready to go at the end of tying w/o having to wipe it down.
    "Did you catch anything".........."No, did you"........

    "Hey man, mind if I fish here?"....."Yes"...."Thanks man!"
    grgoding@yahoo.com

  2. #2
    Join Date
    Jan 2005
    Location
    Tracy, CA
    Posts
    3,341

    Default

    Jeff, that was an outstanding tutorial! I like how you strung those beads and coated 'em like that -- I've never seen that done before. I could see that technique being applied to other patterns as well, thanks for posting it!
    -- Mike

    Chuck Norris has already been to Mars; that's why there are no signs of life.

  3. #3
    Join Date
    Aug 2005
    Location
    Orangevale
    Posts
    915

    Default

    Local tyer Rick Fox came up with that pattern about 7-8 years ago(maybe longer). Great job Jeff, is that what you have been swingin?

  4. #4
    Join Date
    May 2007
    Location
    Sonoma
    Posts
    364

    Default

    That is a very cool tutorial for sure...

    One question, what is the "split thread technique?"
    Often wrong, seldom in doubt!

  5. #5
    Join Date
    Sep 2008
    Location
    Citrus Heights, CA
    Posts
    1,514

    Default

    Quote Originally Posted by Fats View Post
    That is a very cool tutorial for sure...

    One question, what is the "split thread technique?"
    Instead of using a dubbing loop, you actually peel apart the fibers in the thread and insert the material in there. You need to make sure your thread isn't twisted though or it'll be impossible to "split" it.

    I want to see your material clip "secret tool" though. I've been looking for something to use to control CDC in order to use it for dubbing like what you've accomplished.

    _SHig

  6. #6
    Join Date
    Jan 2005
    Location
    Sacramento, CA
    Posts
    1,022

    Default

    I forgot to mention what Charlie said... This pattern was developed by Rick Fox. I'm sure Rick's a great guy and hopefully doesn't mind me posting this, but hey, I ordered like $30 worth the flies some years ago when they just came out and never got em so I had to tie my own. Charlie, I developed my own pattern that I'm using but I'm sure this would bring in some fish. I guess I can give it a whirl next time around except I never tied too many of them and I might be out.

    Shig, the clip is the Magic Tool thing.... from Marc Petijean (sp..) I think people use bulldog clips too as the Magic tool set is like $39.99 now where as I'm sure I paid like $24.99 for mine when it first came out. But it's two sizes of clips which are clear, and 3 material tables and some wooden dowls for cutting stuff (I don't use those, just the clips and tables which are pretty good IMO.)

    Hairstacker, yes, the results are quite nice with coating the beads. LIke I said, I will typically contrast the middle one. In the pictures it's hard to tell, but the middle one is actually a little shinier/different style bead then the other two but it's very similar in color. I would usually use a light tan.

    Shig nailed the split thread technique perfectly. Yes, you do have to use a flat or multi stranded thread. The GG 14/0 is a little small but it splits nicely if you can get a fine enough bodkin. I just let it unwind in between adding materials and it splits w/o any problems. I don't know who developed the technique, but Mark Petijean is who probably used it the most as the Magic tool is kind of geared towards using it and I know he has his own line of "split thread technique" threads. 55 denier GSP is nice to use as well but a dubbing loop is fine also. The pic you can see where I inserted the partridge and the dubbing right into the thread, very similar to a dubbing loop. Not sure what the advantages are over using a dubbing loop, less bulk maybe?? I guess spinning it is easier as you don't need a separate tool. But you can also see where the Magic tool comes in handy as it's great for making hackles and blending them with dubbing or other materials much like a dubbing table. I'm sure you can you tube it in action. Some people think it's a gimmick but I find it quite handy. I'm sure Kienes has a few in the shop as well. If you get one I have the DVD for it I could loan out too but I'm sure Youtube has it all on there somewhere.

    Thanks for the responses everyone. I'll try to do some more or maybe tie at the shop one weekend and show people what's been working on the AR and go over some techniques I've developed that are pretty cool.
    "Did you catch anything".........."No, did you"........

    "Hey man, mind if I fish here?"....."Yes"...."Thanks man!"
    grgoding@yahoo.com

  7. #7
    Join Date
    Jan 2005
    Location
    Sacramento
    Posts
    7,786

    Thumbs up Radical....

    Jeff,.... Good looking pattern. Really enjoyed the tutorial. How much time goes into setting up it up
    "America is a country which produces citizens who will cross the ocean to fight for democracy but won't cross the street to vote."

    Author unknown

  8. #8
    Join Date
    Jan 2005
    Location
    Sacramento, CA
    Posts
    1,022

    Default

    It's a fairly easy tie. You could make multiple bodies before tying them up. I'm not the fastest tier either, but I'd say a 10 minute tie, that would include making the body and tying a fly right away.
    "Did you catch anything".........."No, did you"........

    "Hey man, mind if I fish here?"....."Yes"...."Thanks man!"
    grgoding@yahoo.com

  9. #9
    Join Date
    Aug 2007
    Posts
    401

    Default beads

    They look identical to me from the photos but the contrast with the tan sounds like a good idea. Thanks for the post Jgoding.

Bookmarks

Posting Permissions

  • You may not post new threads
  • You may not post replies
  • You may not post attachments
  • You may not edit your posts
  •